Custom / Modern Maps in Epsilon with Noggit SL
Guide by NORTE.m2 · Version 1.0
This guide does not cover Noggit installation — it assumes the program is already installed and ready to use.
- Noggit Installation: https://marlamin.github.io/modern-map-making/
- Video Tutorial: https://www.youtube.com/watch?v=TP8YpgiGOPs
Requirements
Pre-configured converter:
- https://drive.google.com/file/d/1u1T_OJgSUUAyU_Tffo4kxeqeMWnrT_vk/view?usp=sharing
- Alternative link (same file): https://www.mediafire.com/file/47ckt1it8f6dz0y/Conversor_de_ADT_para_NOGGIT_Moderno.zip/file
This file was already mentioned in the installation guide, but this version comes pre-configured with the correct format and files, saving you several steps.
Other useful links (not required)
- Wow.Export: https://www.kruithne.net/wow.export/
- Modern Map Making Discord: https://discord.gg/C85673kkWd
The screenshots in this guide mix two different projects: "zandalar" and "crestfall". Ignore the file names — the process is the same either way.
Noggit only natively includes maps from Classic WoW. To edit maps from later expansions, you'll need to follow these steps first.
Part 1 — Importing a modern map into Noggit
1 — Download the map files
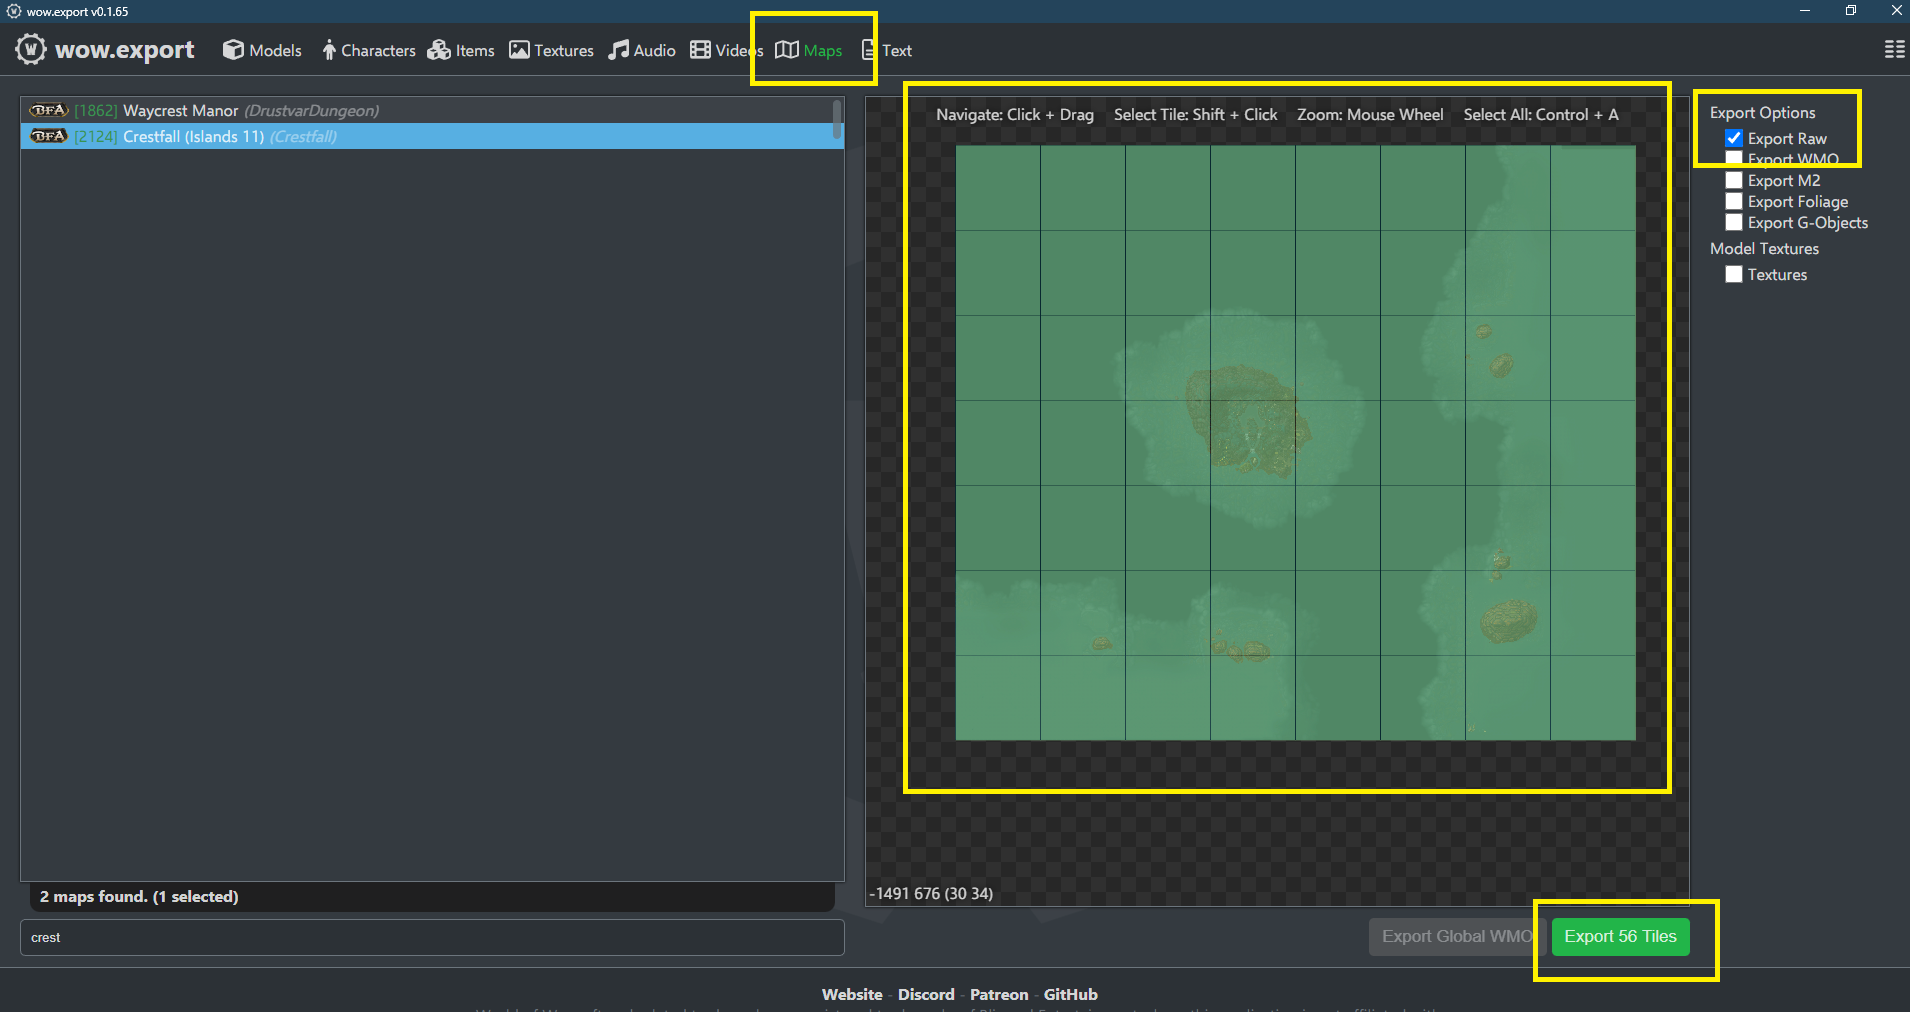
Open wow.export and go to the MAPS section, then search for the map you want.
Select the ADTs (Ctrl+A to select all). Under export options, check only: Export RAW. Then click [Export Tiles].
2 — Move the files into the converter
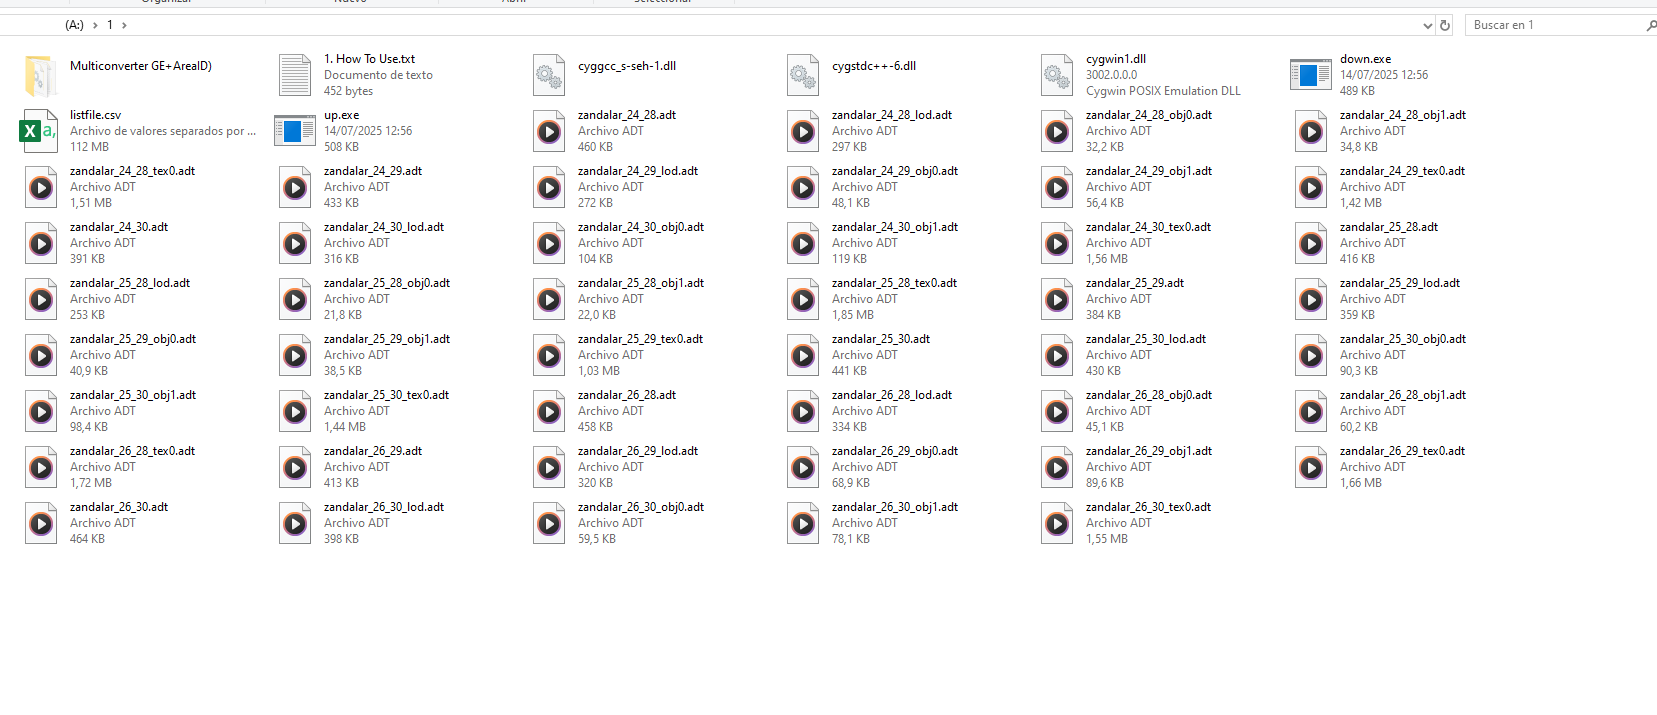
Select all the .adt files and the main .wdt file (e.g. crestfall.wdt if you exported Crestfall) and move them into the [1] folder of the converter.
The converter uses two folders: [1] and [2]. They must be placed at the root of your hard drive. If your drive is C:, the paths should be C:/1 and C:/2.
3 — Run the converter
(The How to use it.txt file inside the package contains the instructions.)
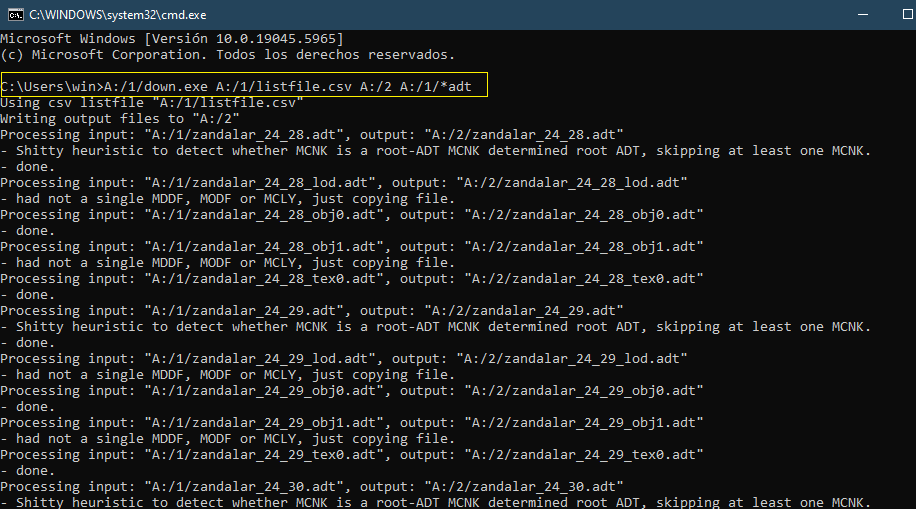
Open CMD (press Windows+R and type cmd) and run the following command. In this example the drive letter is A: — replace it with yours:
A:/1/down.exe A:/1/listfile.csv A:/2 A:/1/*adt
4 — Prepare folder 2
Open folder [1] and find the .WDT file. Move it into folder [2].
5 — Convert the files
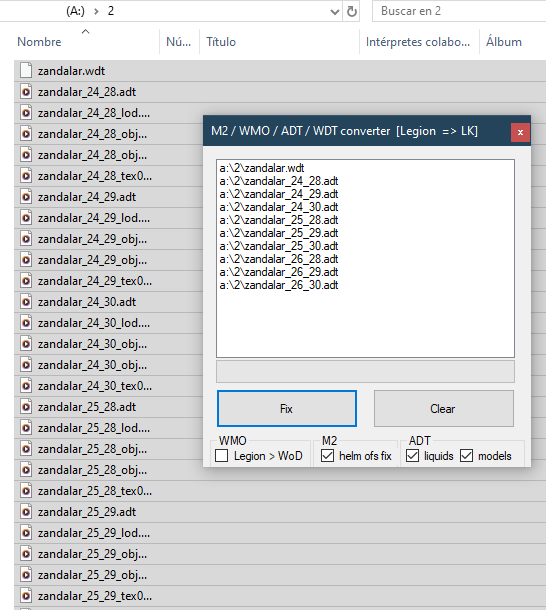
Run multiconverter.exe (found in the 1/Multiconverter subfolder).
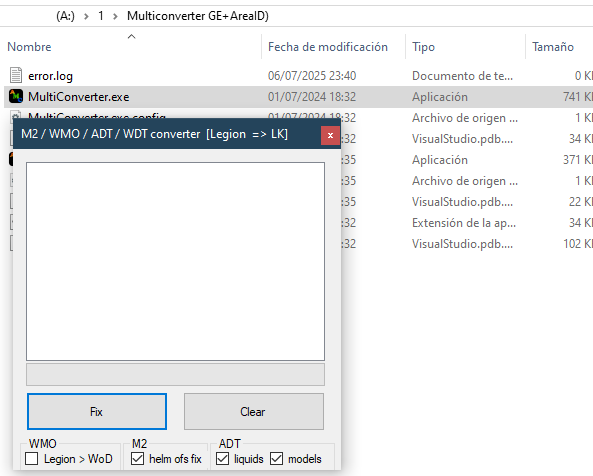
Drag all the files from folder [2] into the white box in the program and click FIX.
6 — Set up the project in Noggit
Inside the Noggit projects folder, create a new folder for your project (the program won't create it automatically).
Then create a new project when you open the program. The name doesn't matter. Open it with a double-click.
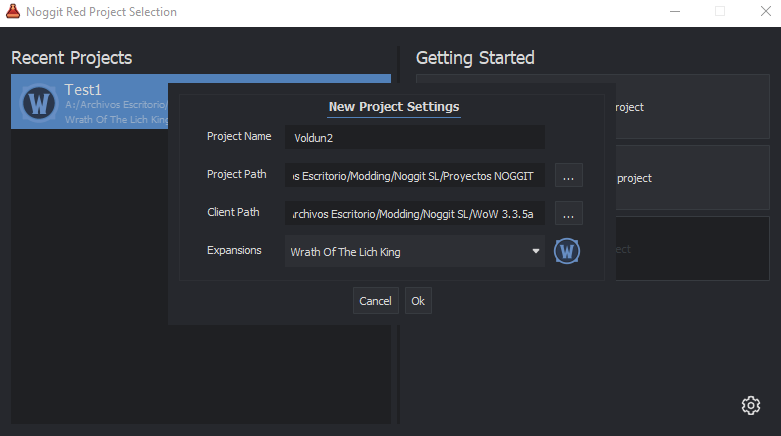
Create a new map:

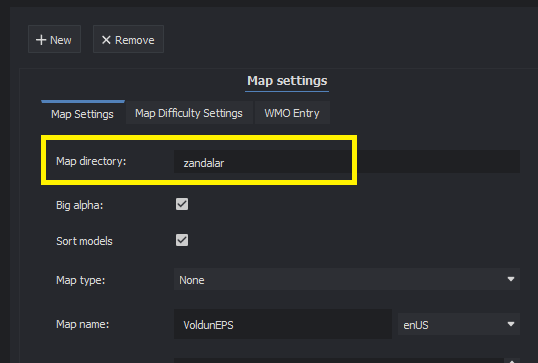
- Map Directory: Should match the name used in the
.adtfiles (e.g.zandalarif the files are namedzandalar_01.adt, etc.). - Map name: You can choose any name you like.
Click [SAVE]. A warning will pop up — accept it.
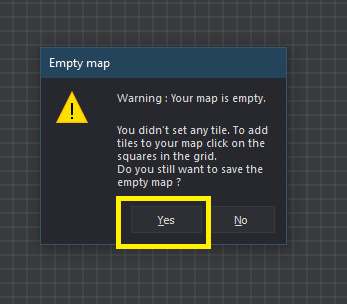
A new empty map will be created:

Once it's ready, close Noggit.
7 — Place the custom map into Noggit
Navigate to the Noggit project folder, then to world/maps/your-map-name — it will be nearly empty.

Copy the files from export folder [2] and place them there.
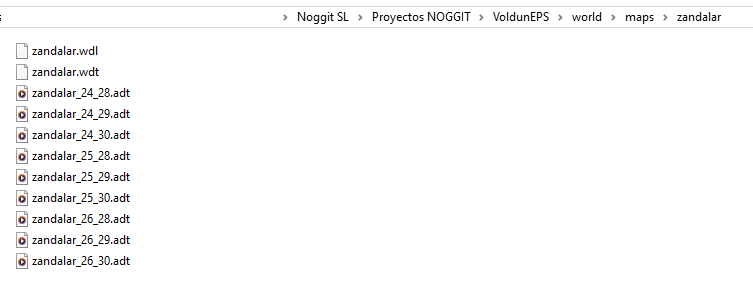
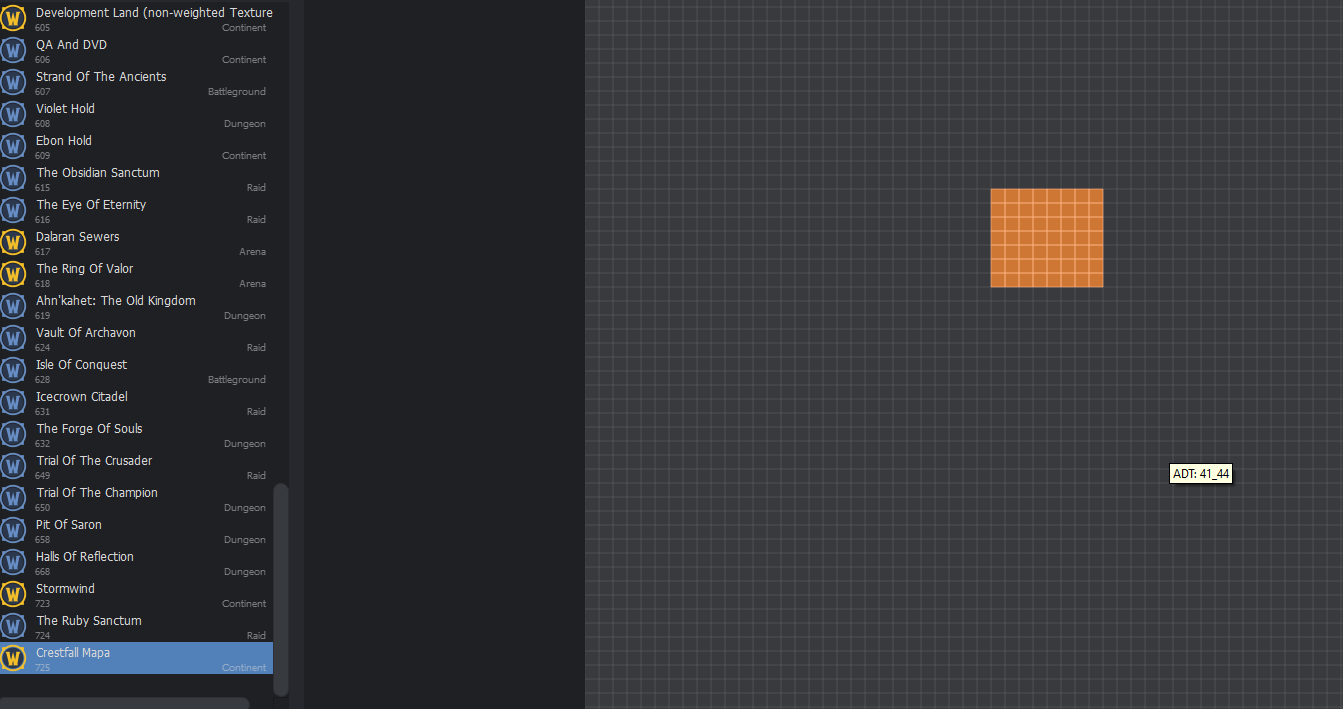
Open Noggit again. Now that the files are in place, the map is no longer empty — you can select an ADT tile and start editing.
Part 2 — Exporting the map to Epsilon
Once you've finished editing the map, save your work and open MapUpconverterGUI.exe from inside the Noggit folder.
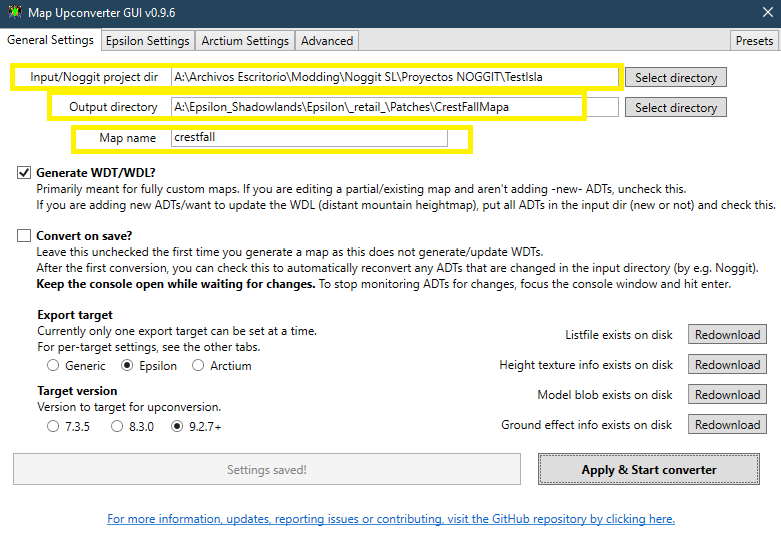
- Noggit Project dir: Should point to your project folder.
- Output: Should point to your Epsilon patch folder.
- Map name: Must match the name used in the
.adtfiles (e.g.zandalar,crestfall, etc.).
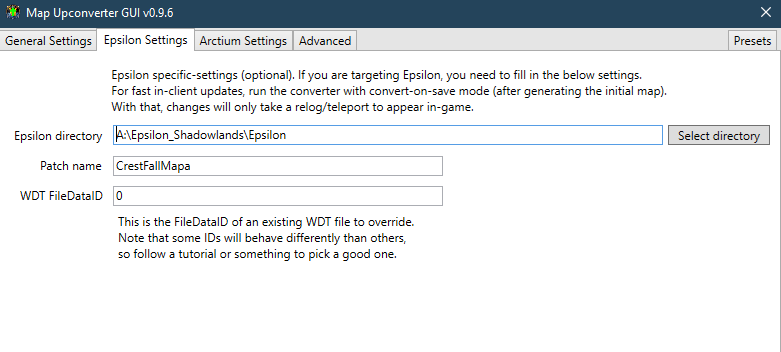
Also fill in the Epsilon Settings section.
After clicking Apply & Start Converter, the program will automatically build the patch in Epsilon. Enable it and you're done!
Part 3 — Extra information and tips
Editing a continent
(For example: Eastern Kingdoms, Zandalar)
WoW zones are grouped into full continent maps. There's no boundary between regions — Elwynn Forest, Westfall, and Tirisfal all belong to the same map: the Eastern Kingdoms.
You can edit a continent, but since Noggit works with Lich King data (3.3.5), you'll need to split your patch so it doesn't affect unedited zones — especially if you downported the map from a newer expansion.
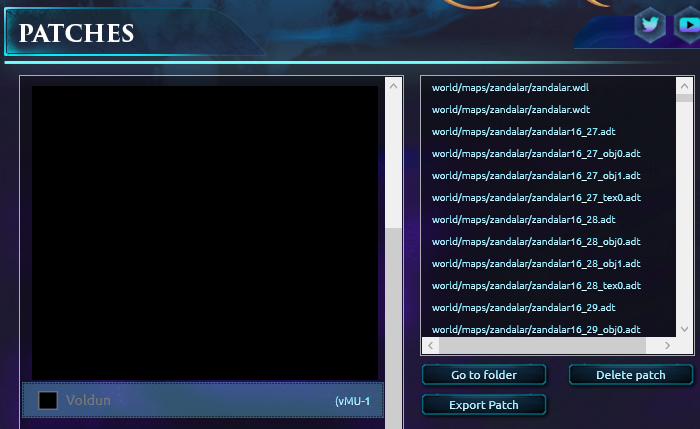
In this example we edited Voldun, which means we worked on all of Zandalar. You'll need to find out which specific ADT tiles you actually edited.
There are two ways to find out:
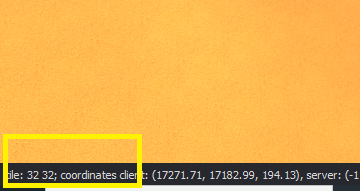
- In the bottom-left corner, Noggit shows the tile coordinates you're standing on. Note those numbers.
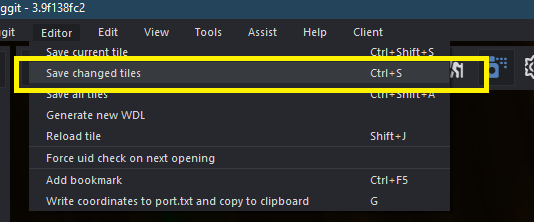
- In Noggit, when saving, click "Save changed tiles".
Inside the project folder, sorting files by date modified will show you which ones were actually saved:
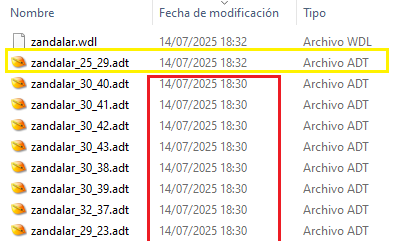
As you can see here, 25_29 was modified most recently.
How to create a partial patch
Convert the entire continent to Epsilon as normal (all ADTs) — this creates a full patch.
Go into that patch folder and extract only the ADT tiles you actually modified. Also extract the .wdt and .wdl files from the patch.
In this case, only 25_29 was modified:
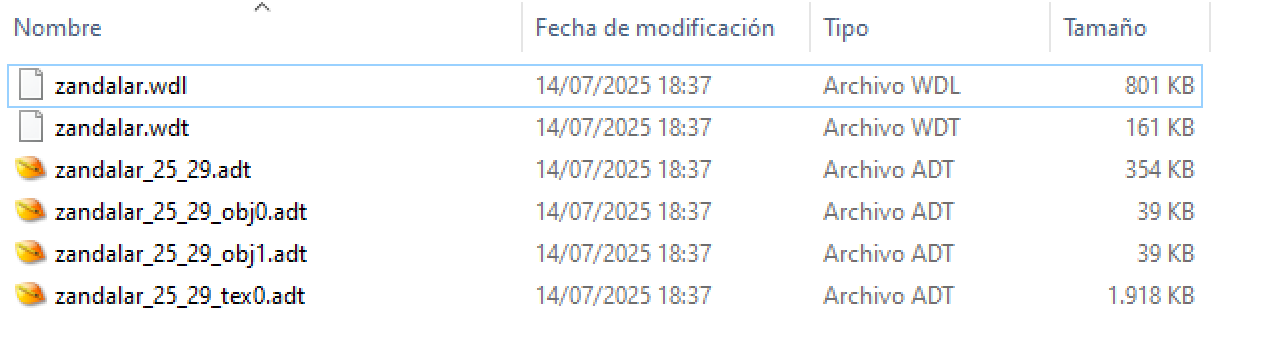
Then build the patch manually from those files, removing the one the program generated automatically.
Done! The rest of the continent's ADTs will load from the base game.
Part 4 — Live preview in Epsilon ("see changes instantly" mode)
Once you've exported the first version and the patch is active in Epsilon, you can enable this mode.
While active, every time you save in Noggit, the changes will update instantly in Epsilon without needing to reload the game.
Step 1 — Advanced tab
In Map Upconverter GUI, go to the [Advanced] tab:

Enable [Enable client refreshing] and enter the MapID:
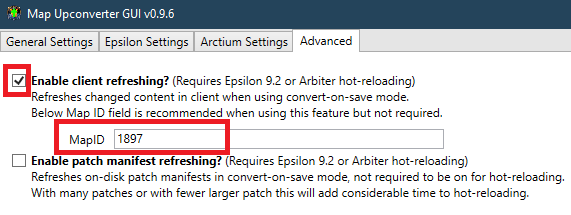
You can get the MapID in Epsilon using the .gps command.

Step 2 — Convert on Save
Go back to [General Settings], check [Convert on Save], and click [Apply & Start Converter]:
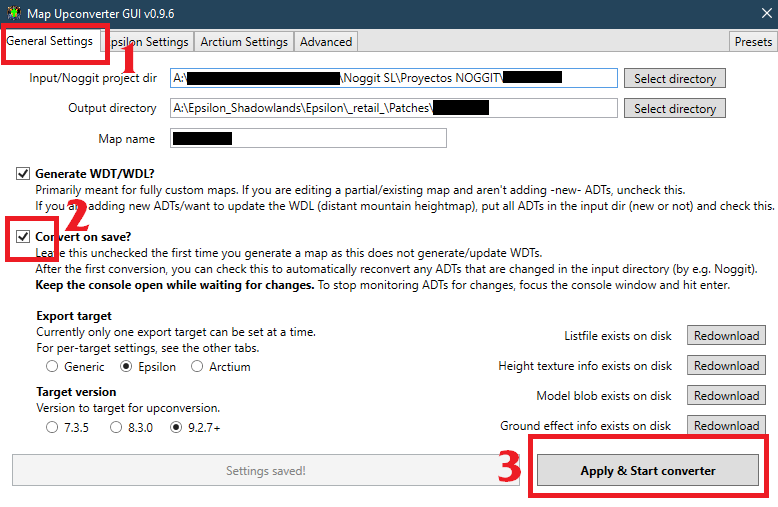
The program will start running. While it's active, every time you press Ctrl+S in Noggit, changes will update in Epsilon in real time.
Next time you want to continue editing, just launch the program and click the button. All settings are saved from last time — you don't need to fill everything in again.
When starting a fresh patch from scratch, make sure to disable these options first.